
Meta Pixel Base Code: Manual Installation Guide
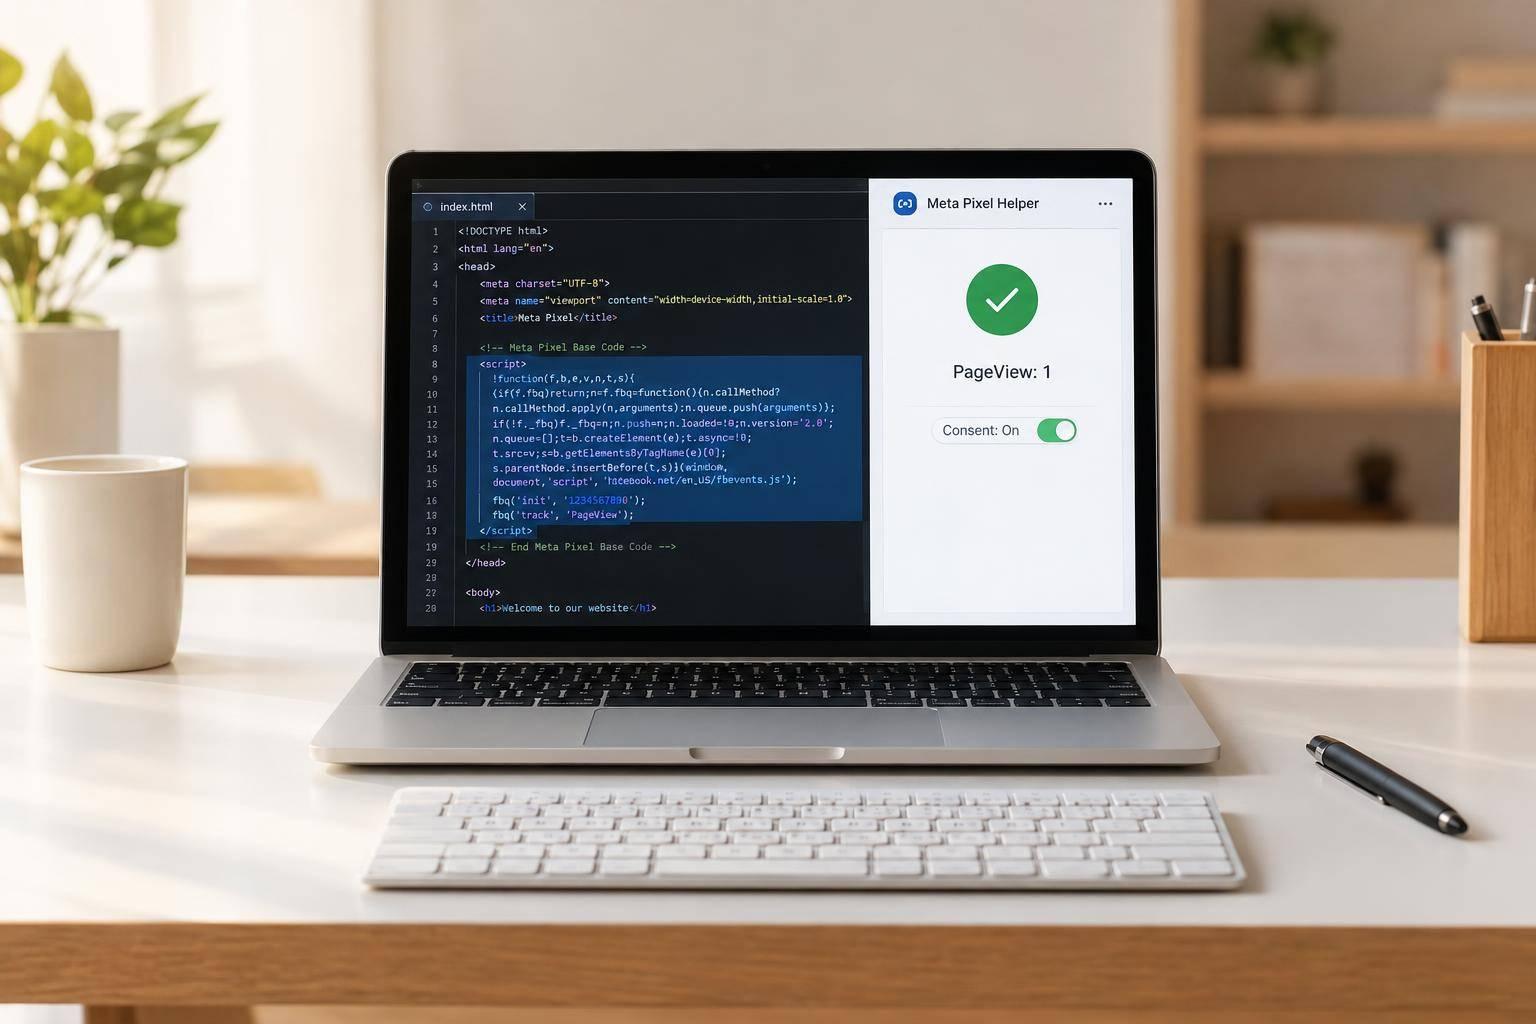
Meta Pixel Base Code: Manual Installation Guide
Install the complete Meta Pixel base code once in the sitewide <head>, then confirm one PageView per permitted page load. First, verify the Pixel ID, remove overlapping installations, and connect tracking to consent controls.
After publishing, use Events Manager’s Test Events to check at least 3 live page types. Check separate checkout domains and single-page app navigation, too. If events are missing or duplicated, review header coverage, consent settings, blocked scripts, and extra event calls.
A working PageView tracks page visits - not leads or purchases. Those actions need separate events and tests.
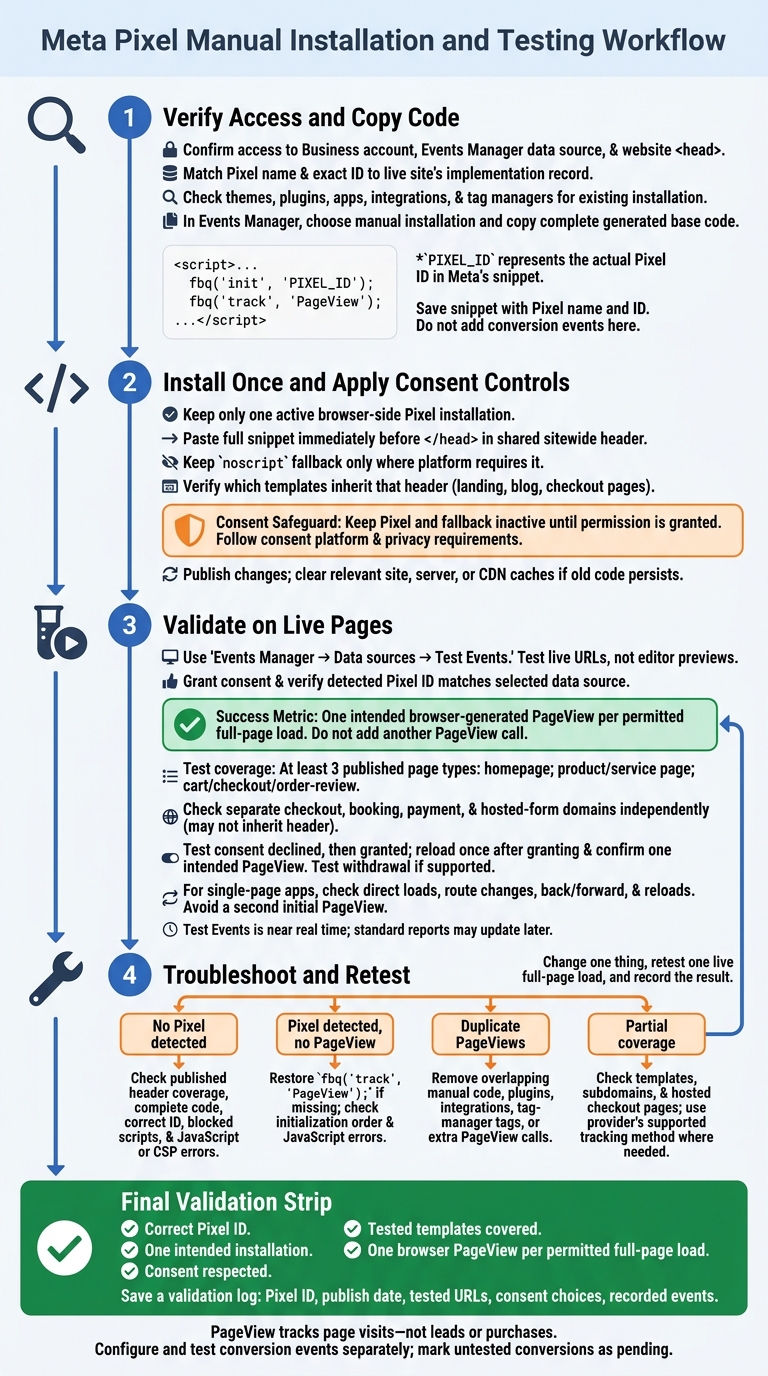
Meta Pixel Manual Installation and Testing Workflow
1. Check Access and Get the Base Code
Confirm that you can access the correct Meta Business account, Events Manager data source, and website <head>. You’ll need this access to publish the Pixel once, sitewide.[3][4]
Before copying any code, check whether your theme, plugin, app, or tag manager already manages the Pixel. Once you’ve confirmed access and checked the existing setup, select the correct Pixel and copy its full base code.
Select Your Pixel in Events Manager
- Open Meta Events Manager and select the intended website data source.
- Go to Data Sources or Datasets & pixels, then choose the Pixel or website data source.
- Match the source name and exact ID to your live site’s implementation record.[1]
- Choose Add Events, Set Up, or Continue Pixel Setup. Select Meta Pixel or Web if prompted.
- Choose Install code manually or Manually Add Code to Your Website, then continue until Meta displays the generated snippet.
Your Pixel may appear within a dataset, depending on the interface. When an existing Pixel is linked to a dataset, they share the same ID.[5] Confirm the Pixel ID before copying the complete snippet.
Copy the Complete Base Code
Click Copy code to copy the full snippet exactly as Meta generates it. Include both fbq('init', 'PIXEL_ID') and fbq('track', 'PageView'). The generated code contains your actual Pixel ID - not the literal placeholder PIXEL_ID.
Save the snippet with the Pixel name and ID before publishing. Don’t add conversion events here. Next, paste this exact code into the sitewide header.
sbb-itb-db0d145
2. Install the Code in the Sitewide Header
Place the same snippet once in the shared header so it loads on every page that inherits that header.
Check for an Existing Installation
Search plugins, tag-manager containers, theme/header settings, and integrations for your Pixel ID, fbq('init', or fbevents.js. Keep only one active browser-side Pixel installation.[7][8]
Paste the Code Inside the Shared Header
Open the shared header template or shared header code field. Paste the snippet immediately before </head>, and keep the noscript fallback only where your platform requires it.[2][6][9]
Next, check which templates use that header, including separate landing-page, blog, and checkout templates. A shared header covers only templates that inherit it, so verify every page type you need to track.[2][3]
Set Consent Controls and Publish
Connect tracking to your consent controls so the Pixel and fallback stay inactive until permission is granted. Where applicable, Meta supports fbq('consent', 'revoke') before initialization and fbq('consent', 'grant') after consent is granted. Follow your consent platform’s instructions and applicable privacy requirements.[10][11]
Save and publish the changes. If older code is still being served, clear the relevant site, server, or CDN caches. Open the live site in a private window to check the published code and confirm tracking runs only when permitted.[2][3] Then test the live pages for the correct Pixel ID and confirm that PageView fires.
3. Test PageView on the Live Website
After publishing, check the live Pixel in Test Events before reviewing reports.
Verify the Pixel ID and PageView
Open Meta Events Manager → Data sources, select the intended Pixel or dataset, and open Test Events. Visit the live URL - not an editor preview - grant consent, and look for PageView in the event stream.[13]
If available, use Meta Pixel Helper to check that the detected Pixel ID matches your selected data source. Confirm that one intended browser-generated PageView fires per page load, with no error. Don’t add another PageView call.[12][14][15]
Test Events shows activity in near real time; standard reports may take longer to update.[13] Don’t change working code just because a report is empty. Record the test time, browser, device, URL, consent choice, Pixel ID, and event name so you can repeat the test when troubleshooting.
Check Coverage Across Page Types
Once the homepage test passes, repeat it on other templates that use different headers.
Test at least 3 published page types: the homepage, a product or service page, and a cart, checkout, or order-review page. Check separate checkout, booking, payment, or hosted-form domains independently. They may not inherit the shared header.[3]
| Checkpoint | Expected result | Corrective action |
|---|---|---|
| Pixel ID | Detected ID matches the selected data source | Correct the ID or remove an outdated installation |
| PageView detection | One intended browser PageView per permitted full-page load |
Check consent, blocked scripts, JavaScript errors, and duplicate calls |
| Page coverage | Each tested template sends the expected event | Fix missing templates or use the hosted provider’s supported tracking method |
Test Consent and Page Navigation
Once the live PageView works, test again with consent blocked, then granted.
- Start a new session and decline consent. Confirm that blocked Pixel activity stays blocked. Then grant consent, reload once, and check for one intended
PageView. Test consent withdrawal too, if supported.[10][11] - Follow internal links to compare full-page loads with navigation that doesn’t reload the page. For single-page apps, test direct loads, route changes, back/forward navigation, and page reloads to determine whether a separate
PageViewtrigger is needed.
4. Fix Missing or Duplicate Events
If Test Events shows no PageView activity - or shows it twice - use these checks to find the cause.
| Symptom | What to check and fix |
|---|---|
| No Pixel detected | Make sure the complete code is published in the affected page’s shared <head>. Match the Pixel ID to Events Manager, then check that the page loads the published header. Look for blocked scripts and JavaScript or CSP errors. |
| Pixel detected, no PageView | Restore fbq('track', 'PageView'); if it’s missing. Check the initialization order and look for JavaScript errors that stop the code from running. |
| Duplicate PageViews | Remove overlapping manual code, plugins, native integrations, tag-manager tags, or extra PageView commands. Keep one intended installation path. |
| Partial coverage | Check templates, subdomains, and checkout pages that don’t inherit the global header. Fix the installation on the affected pages. |
Find Missing Events and Coverage Gaps
Start with the live page, not the CMS. Check its source for the correct Pixel ID and complete base code on affected templates. In browser developer tools, use Network to find failed Meta requests and Console to check for JavaScript or CSP errors. Test under the site’s actual consent rules.
If published changes don’t appear, purge the relevant CMS, server, and CDN caches. Check whether performance tools delay or rewrite the Pixel script. Review the CSP rules for script-src, img-src, and connect-src, but don’t weaken them to force delivery.
Remove Duplicate Code and PageView Calls
Search templates, header settings, plugins, integrations, tag managers, and custom scripts for fbevents.js, fbq('init', and PageView. Check platform settings, too: injected code may not appear in the page source. Repeated Pixel ID text alone doesn’t prove duplication. Look for separate installations or event senders.
Keep the intended installation and remove overlapping senders. Retain the default PageView command, but remove unintended extra calls. For single-page apps, make sure route changes don’t trigger a second initial PageView.
After each change, test one live full-page load. Inspect browser requests to confirm there’s one browser PageView per load, and record the result before changing anything else.
Conclusion: Confirm Your Pixel Is Working
Your base installation is ready when the correct Meta Pixel snippet appears once in the global <head>, follows consent settings, and is live. Check that each tested live page records one PageView, including the homepage, a product or service page, and a confirmation page.[3]
PageView confirms only that the base code tracks page loads. Once you’ve checked the base code, test each conversion event separately in Events Manager before using it for measurement. Document the results for future checks.[16][17]
Save a validation log with the Pixel ID, publish date, tested URLs, consent choices, and recorded events. Mark any untested conversion events as pending.
FAQs
Will a theme update remove my Meta Pixel code?
Yes, a theme update can remove your Meta Pixel code if you added it directly to your website’s header files. Theme updates often overwrite those edits.
To prevent this, use a partner integration or Google Tag Manager to manage tracking scripts separately from your theme. If you install the code manually, be ready to add it back to the header after each theme update.
How do I track PageViews without page reloads?
Use manual event tracking when page loads alone don’t cover the views you want to track. The default base code only fires on the initial page load.
Add fbq('track', 'PageView') to your site’s JavaScript, then call it each time the application switches to a view you want to record as a PageView.
This works for single-page applications (SPAs) and dynamic content updates where the URL changes or the content updates without a full browser reload.
How can I tell duplicate PageViews from repeat visits?
Check the Diagnostics tab in Meta Events Manager for duplicate-event warnings. Then use Meta Pixel Helper to see whether multiple PageViews fire during a single page load. Check your header for extra event code alongside the base code, and look for overlapping Google Tag Manager triggers.
If you also use the Conversions API, set up deduplication with a distinct event_id for each action. Use that same ID for the matching browser and server events.


